- Author Maria Gibbs gibbs@autolifeadvice.com.
- Public 2023-12-16 03:05.
- Last modified 2025-06-01 05:12.
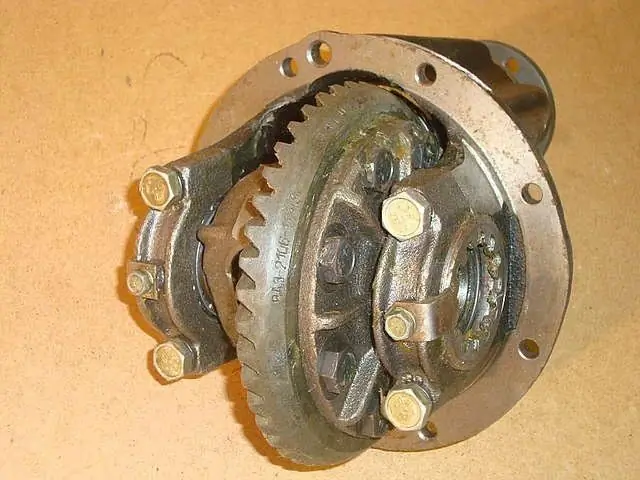
After long-term operation of the car in difficult conditions or with a trailer, the rear axle gearbox may fail. As a rule, this does not pose any danger, but constantly when the speed is exceeded at 30 km / h, a strong hum will be heard. The rear gearbox on the classic VAZ models is a rather complicated unit from a technical point of view. In the absence of certain repair skills and the necessary devices, it is better to seek help from specialists.

Necessary
- - torque wrench;
- - vernier caliper;
- - adjusting rings;
- - fine sandpaper;
- - strong thread.
Instructions
Step 1
Thoroughly clean the rear gearbox parts with a brush and rinse them in kerosene. Then do a visual inspection. If even one tooth of the gear is found to be damaged (scoring, chipping, waves or marks), replace the defective parts immediately. The edges between the working surfaces and the tops of the teeth must be sharp. If nicks or rounds are found, the main pair should be replaced. You can remove small defects with fine sandpaper, and then polish them thoroughly.
Step 2
When assembling, replace the spacer sleeve, flange nut and collar with new parts. When assembling the gearbox in the old crankcase, calculate the change in the size of the drive gear adjusting ring. This will be the difference in thickness deviation between the old and new gear. These designations are indicated in hundredths of a millimeter on the pinion shaft by marks "+" and "-". For example, if on the new gear the number is "- 3", and on the old "10", then the difference between the two corrections will be 3 - (- 10) = 13. Thus, the thickness of the new shim should be 0.13 mm less than the old one.
Step 3
Determine the size of the thickness of the adjusting ring more precisely. To do this, make a special device from the old drive gear: weld on a metal plate, the length of which is 80 mm, and tear it off to a size of 50-0.02 mm, respectively, to the plane for the bearing. The serial number, as well as the size deviation, are embossed on the tapered element.
Step 4
With a fine sandpaper, grind the seats under the bearings until they slide into place. Press the outer rings of both bearings into the crankcase. Install the inner race of the rear bearing onto the tool. Then insert it into the crankcase. Put the inner ring of the front bearing, then the drive gear flange, and fix the nut with a torque wrench (0, 8-1, 0 kgf. M).
Step 5
Take a level and place the crankcase on it in a horizontal position. Put a flat round rod in the bearing bed and use a flat feeler to determine the size of the gap between the fixture plate and it. The difference between the clearance and the deflection of the new gear will be the thickness of the adjusting ring. For example, when the gap is 1.8 mm and the deviation is 12, then the thickness of the adjusting ring will be 1.8 - (- 0, 12) = 1.92 mm.
Step 6
Take a piece of pipe and, acting as a mandrel, install the adjusting ring on the shaft. Place the shaft in the crankcase. Then install the spacer sleeve, then the inner ring of the front bearing, then the collar and flange of the pinion gear. Using a torque wrench, fix the nut to a torque of 12 kgf. m.
Step 7
Wind tight thread around the neck of the flange. Attach a dynamometer to it. This will make it possible to determine the moment of rotation of the pinion shaft. With new bearings, the flange should turn when applying a force of 7, 6-9, 5 kgf. If this is not enough, then tighten his nut. Please note that the tightening torque should not exceed 26 kgf. m. When, when turning, the moment of force exceeds 9, 5 kgf, you need to disassemble the gearbox and replace the spacer sleeve.
Step 8
Install the differential housing with bearings in the crankcase. Fix the bolts to the bearing cover. If you find axial play in the gears of the axle shafts (when assembling the gearbox), install thicker adjusting rings. Insert the side gears into the housing firmly, but they should rotate by hand. To tighten the adjusting nuts, make a wrench from steel sheet 3 mm thick.
Step 9
Adjust the pre-tension of the differential bearings and the clearance in the main pair. To do this, tighten the driven gear nut and eliminate the meshing clearances. Take a vernier caliper and measure the distance between the covers; tighten the second nut as far as it will go, pulling it out by 1-2 teeth. Watch the gap - between the covers, it should be almost 0.1 mm larger; rotating the first nut, set the mesh in engagement, it is equal to 0.08-0.13 mm. You can feel it with your fingers as a slight backlash in the engagement. Also, you will hear a slight knocking of a tooth against a tooth.
Step 10
Use your hand to control the constancy of the clearance in this engagement, gradually tightening both nuts. Repeat the procedure until the distance between the covers is 0.2 mm more. Slowly rotate the driven gear three turns while simultaneously feeling for play in each pair of teeth in engagement. If it is uniform in all positions, install the locking plates.


