- Author Maria Gibbs gibbs@autolifeadvice.com.
- Public 2023-12-16 03:05.
- Last modified 2025-01-22 17:47.
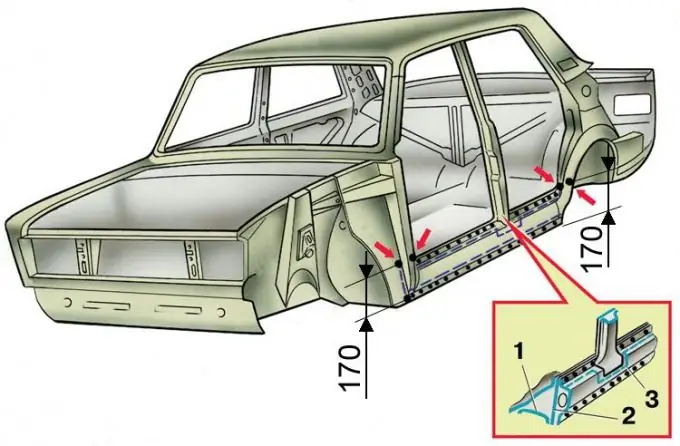
The design of the thresholds of the car body consists of three elements: inner and outer linings, inside of which the third element is hidden - the power box. And when it comes to repairing sills, as a rule, they mean replacing the outer sill trim.

It is necessary
- - electric drill with a drill with a diameter of 6 mm,
- - grinder,
- - body chisel,
- - hole punch for metal,
- - clamps - 4 pcs.,
- - carbon dioxide, electric welding machine.
Instructions
Step 1
To replace the sill, you must first dismantle the rear and front fenders. The wings are removed only on the side on which the sill is being restored.
Then, with an electric drill, recesses are made in the spot welds, with the help of which the outer pad is attached to the body. Depressions are made only in the outer pad, so as to cut the welded metal and loosen the pad attachment, which is later cut with a body chisel.
Step 2
After removing the sill lining, the place of the future docking of the new element with the body is cleaned with a grinder.
Step 3
On the new pad, along the perimeter, a hole punch makes a number of holes, the number of which will be sufficient for reliable fastening of the part. As a guideline for the quantity, determine the dismantled pad.
Step 4
The prepared pad is applied to the threshold and exposed, guided by the body pillar between the doors.
Step 5
Having clearly fixed the lining with clamps, they begin to weld it to the body, filling the holes previously made in it with a hole punch with molten metal.
Step 6
It is necessary to start welding according to the scheme: from the middle to the edges, alternately boiling the upper and lower holes.
Step 7
After installing the front and rear fenders in place, the car is sent for painting.


